How to Set the Classic Ribbon as Default in Outlook via Group Policy, Registry & Intune
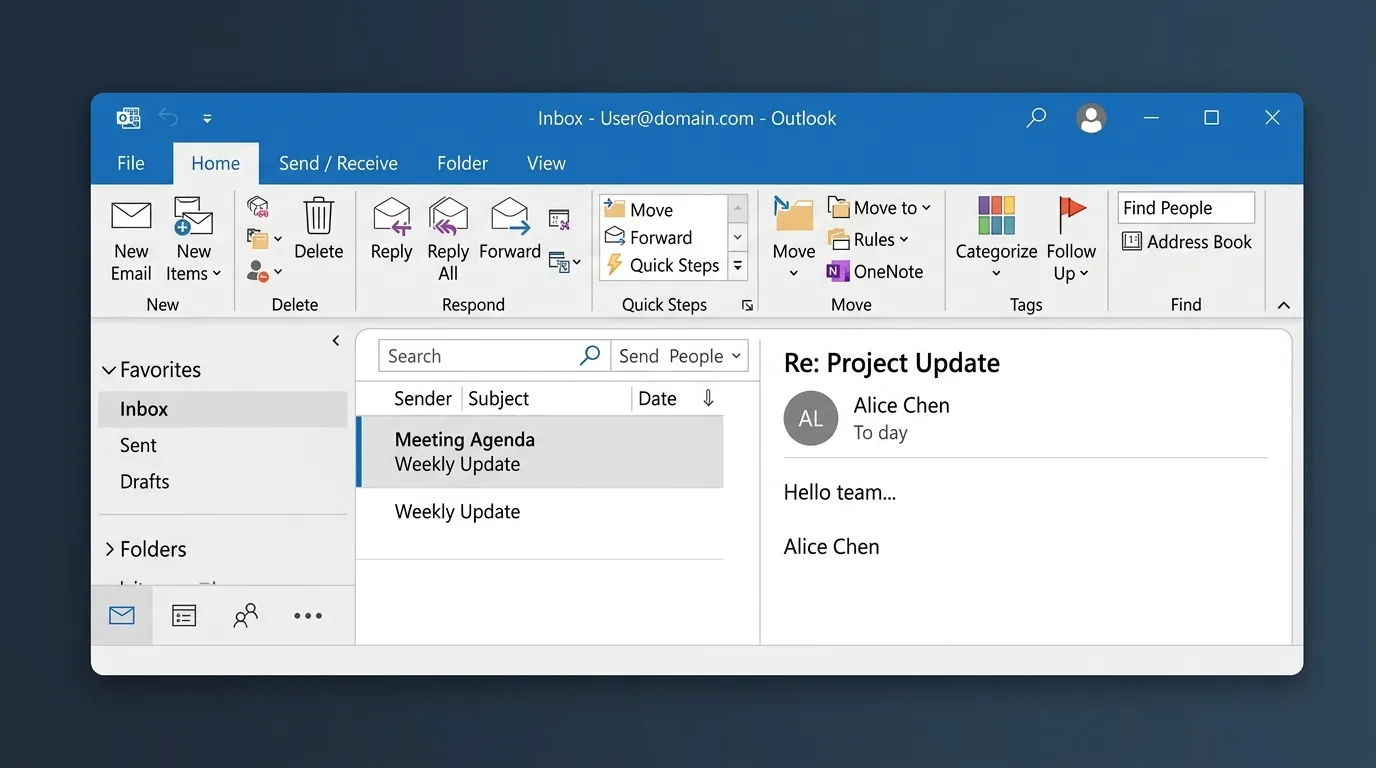
When Microsoft rolled out the single-line Simplified Ribbon across Microsoft 365 and Office apps, many users and enterprise clients found it stripped away essential quick-action icons they relied upon daily.
While users can manually toggle between the Simplified and Classic ribbons using the chevron (⌵) icon on the bottom right of the ribbon, IT administrators frequently need a centralized way to enforce the Classic Ribbon across all domain-joined or cloud-managed workstations.
In this guide, we cover the exact steps to deploy this setting via Active Directory Group Policy (GPO), PowerShell / RMM, and modern Microsoft Intune Settings Catalog.
Simplified Ribbon vs. Classic Ribbon Overview
 Outlook Simplified Ribbon (Single line, hidden actions)
 Outlook Classic Ribbon (Full expanded multi-row ribbon)
Method 1: Deploy via Active Directory Group Policy (GPO)
Because Microsoft’s administrative ADMX templates for Office don’t have a direct checkbox policy for this specific toolbar toggle, the cleanest method is deploying a Group Policy Registry Preference:
Step 1: Create or Edit a Group Policy Object
- Open Group Policy Management (
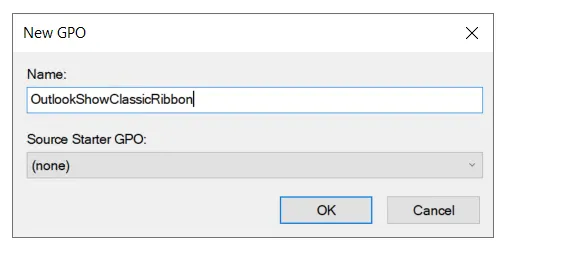
gpmc.msc) on your Domain Controller or management jump box. - Right-click your target User Organizational Unit (OU) and select Create a GPO in this domain, and Link it here…
- Name the GPO descriptively (e.g.,
GPO-User-Outlook-ClassicRibbon).
Step 2: Configure the Registry Preference Item
- Right-click the GPO and click Edit.
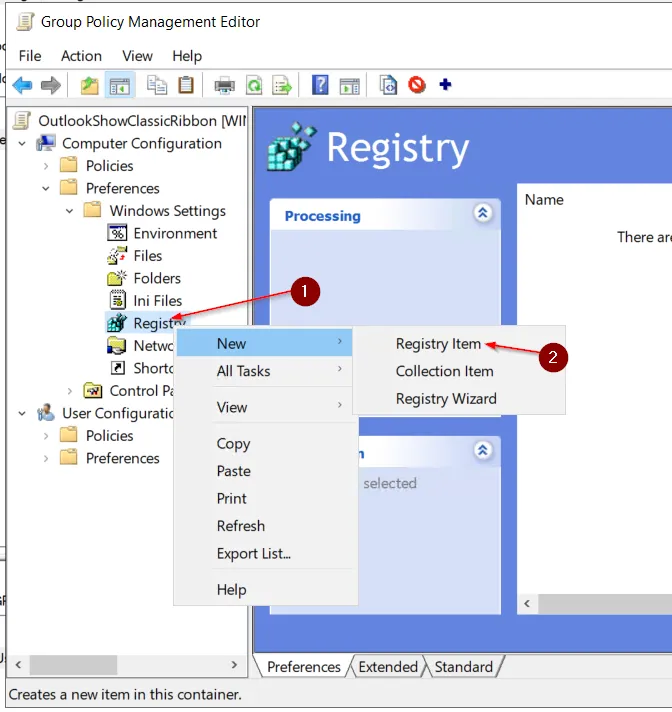
- Navigate to: User Configuration > Preferences > Windows Settings > Registry.
- Right-click Registry > New > Registry Item.
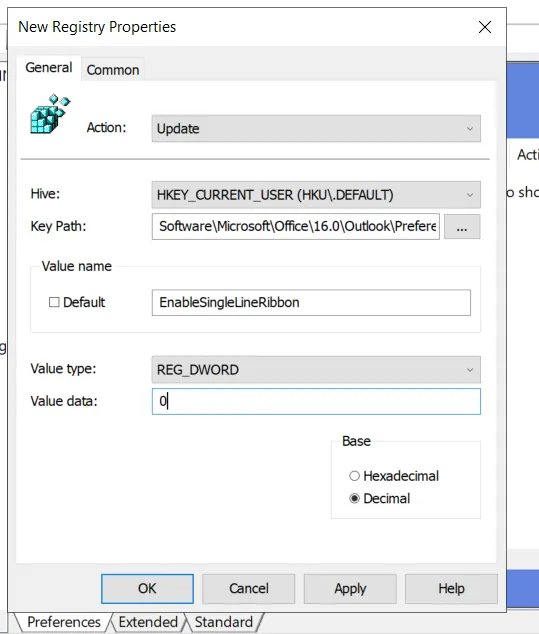
- Configure the following parameters:
- Action:
Update - Hive:
HKEY_CURRENT_USER - Key Path:
Software\Microsoft\Office\16.0\Common\Toolbars\Outlook - Value Name:
EnableSingleLineRibbon - Value Type:
REG_DWORD - Value Data:
0(Decimal / Hexadecimal)
- Action:
- Click Apply and OK.
Method 2: Deploy via PowerShell (for RMM, Intune Scripts, or Automation)
If you manage endpoints with an RMM (Datto, NinjaOne, ConnectWise) or deploy user logon scripts, you can enforce this registry value instantly with PowerShell:
# Set Outlook Classic Ribbon as Default (Current User Context)
$RegistryPath = "HKCU:\Software\Microsoft\Office\16.0\Common\Toolbars\Outlook"
$ValueName    = "EnableSingleLineRibbon"
$DesiredValue = 0

# Create the key path if it does not exist
if (-not (Test-Path -Path $RegistryPath)) {
    New-Item -Path $RegistryPath -Force | Out-Null
}

# Set the DWORD value
Set-ItemProperty -Path $RegistryPath -Name $ValueName -Value $DesiredValue -Type DWord -Force

Write-Output "Successfully configured Outlook Classic Ribbon for user: $env:USERNAME"
Note: Because this setting lives under
HKEY_CURRENT_USER(HKCU), ensure your RMM or script deployment runs under the Logged-on User context, not the local SYSTEM account.
Method 3: Deploy via Microsoft Intune (Cloud-Managed Workstations)
For cloud-native endpoints managed in Microsoft Intune / Microsoft Endpoint Manager:
- Sign into the Microsoft Intune admin center.
- Go to Devices > Windows > Configuration profiles > Create profile.
- Select Platform:
Windows 10 and later, Profile type:Settings catalog. - Name the profile:
Win11 - Outlook Classic Ribbon Default. - Under Settings picker, search for
Outlook Ribbonor configure a Remediation Script using the PowerShell code above (configured to Run this script using the logged-on credentials). - Assign the policy to your target Entra ID User Group.
Verification & Troubleshooting
How to Verify the Policy Applied
To confirm the policy has applied successfully on a client workstation:
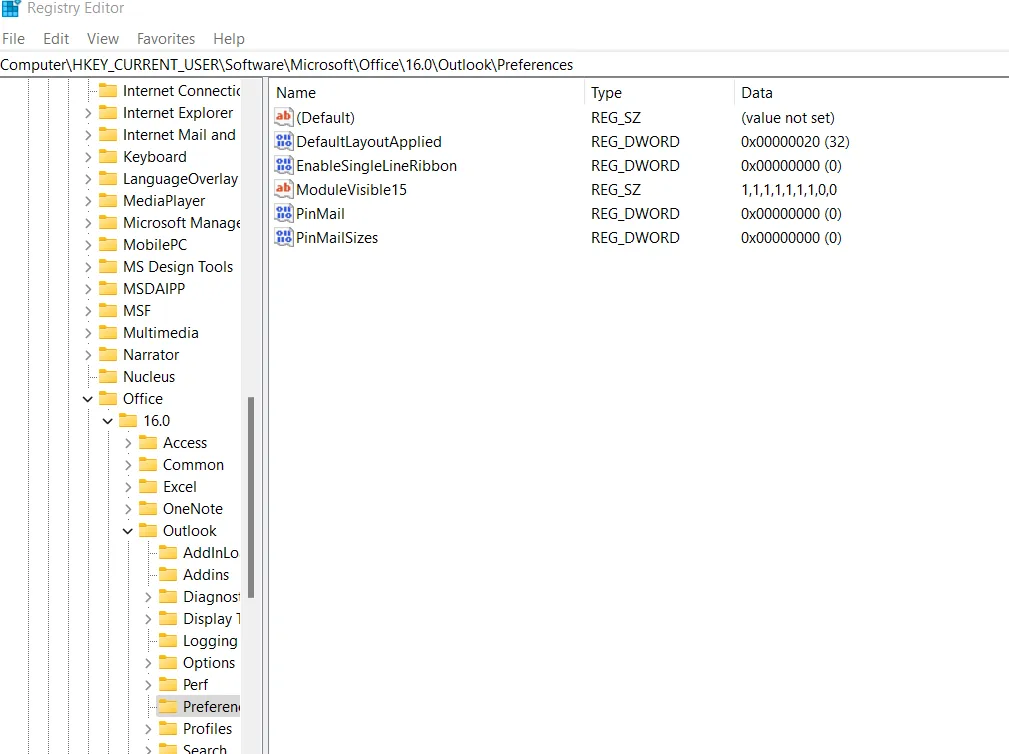
- Run
gpupdate /forcein an elevated terminal to fetch the latest domain policies. - Open
regedit.exeand navigate to:HKEY_CURRENT_USER\Software\Microsoft\Office\16.0\Common\Toolbars\Outlook - Verify that
EnableSingleLineRibbonis present and set to0.
Common Troubleshooting Scenarios:
- “New Outlook for Windows” vs. Classic Outlook (M365 Apps): This registry key targets Classic Outlook for Windows (the Win32 application included with M365 Apps for Enterprise). The new web-based “Outlook for Windows” client uses a different cloud-synced web UI layout.
- Key does not apply: Ensure the GPO is linked to the User OU rather than a Computer OU, or ensure User Group Policy Loopback Processing is enabled if linking to Computer OUs.